Whimsical Graduation Cookie Pops
Highlighted under: Quick Baking Recipes
I absolutely adore making treats that celebrate milestones, and these Whimsical Graduation Cookie Pops are no exception! They are not only fun to make but also bring smiles to everyone’s faces. Shaped like graduation caps and diplomas, these cookies are perfect for a graduation party or to congratulate a friend. The best part is that you can customize the colors and decorations to match the school's theme, making each one unique. Join me in creating a playful and delicious way to honor the graduates in our lives!
When I first attempted to create these cookie pops, I was surprised at how quickly they came together. I experimented with different cookie recipes, but I found a classic sugar cookie dough worked best, providing a sturdy yet delightful base. Sifting the flour and incorporating real vanilla makes all the difference in flavor!
During the decorating process, I discovered that using melted chocolate for the molds ensured the caps held together beautifully. Adding a sprinkle of edible glitter on top not only made them visually appealing but also brought that extra celebratory flair. These pops really are a joy to make and share!
Why You Will Love These Cookie Pops
- Delightfully whimsical designs that excite kids and adults alike
- Customizable decorations to fit any graduation theme
- Deliciously sweet with a hint of vanilla in every bite
Perfecting Your Cookie Dough
The foundation of delightful Whimsical Graduation Cookie Pops lies in the cookie dough. Using unsalted butter is essential to control the saltiness in your cookies, allowing the sweetness of the sugar and the vanilla flavor to shine through. Make sure to thoroughly cream the butter and sugar together; this step incorporates air, leading to a lighter texture in the final cookie. Avoid over-mixing after adding the dry ingredients to prevent a tough cookie.
Chilling the dough for 30 minutes is a significant step that enhances the cookie’s structure and prevents them from spreading too much while baking. If you're short on time, consider placing the dough in the freezer for about 15 minutes instead. When rolling the dough into balls, aim for uniform sizes to ensure even baking. A cookie scoop can be useful here for consistent portions.
Shaping and Baking Tips
When shaping your cookies into caps and diplomas, use cookie cutters that are sharp and well-floured to prevent sticking. For the caps, consider using cutters with varied sizes to create an assortment for visual interest. After placing the lollipop sticks, ensuring they're firmly embedded halfway in will prevent them from falling out post-bake. Watch the cookies closely in the oven; they are done when the edges turn a light golden brown, typically around 10 to 15 minutes at 375°F (190°C).
If you notice your cookies puffing up instead of spreading out flat, it may be due to the dough being too cold. Letting the dough sit at room temperature for 5-10 minutes prior to shaping can help. If the cookies spread too much, check your measuring techniques for flour; it’s best to spoon flour into the measuring cup and level it off for accuracy.
Ingredients
Gather these fun ingredients to create your whimsical cookie pops:
For the Cookie Dough
- 2 3/4 cups all-purpose flour
- 1 teaspoon baking soda
- 1/2 teaspoon salt
- 1 cup unsalted butter, softened
- 1 1/2 cups sugar
- 1 egg
- 1 tablespoon vanilla extract
For the Decoration
- 1 cup white chocolate melts
- Food coloring (optional for decorating)
- Black decorating gel for caps
- Lollipop sticks
- Edible glitter (optional)
Now you have everything you need to bring these cookie pops to life!
Instructions
Follow these simple steps to create your whimsical cookie pops:
Make the Cookie Dough
In a bowl, combine flour, baking soda, and salt. In a separate large bowl, cream together softened butter and sugar until smooth. Beat in egg and vanilla. Gradually mix dry ingredients into the wet until combined. Chill dough for 30 minutes.
Shape and Bake
Preheat your oven to 375°F (190°C). Roll the chilled dough into small balls and flatten them slightly. Using a cookie cutter, shape them into caps and diplomas. Place on a baking sheet and insert lollipop sticks halfway into each cookie. Bake for 10-15 minutes until edges are lightly golden.
Decorate
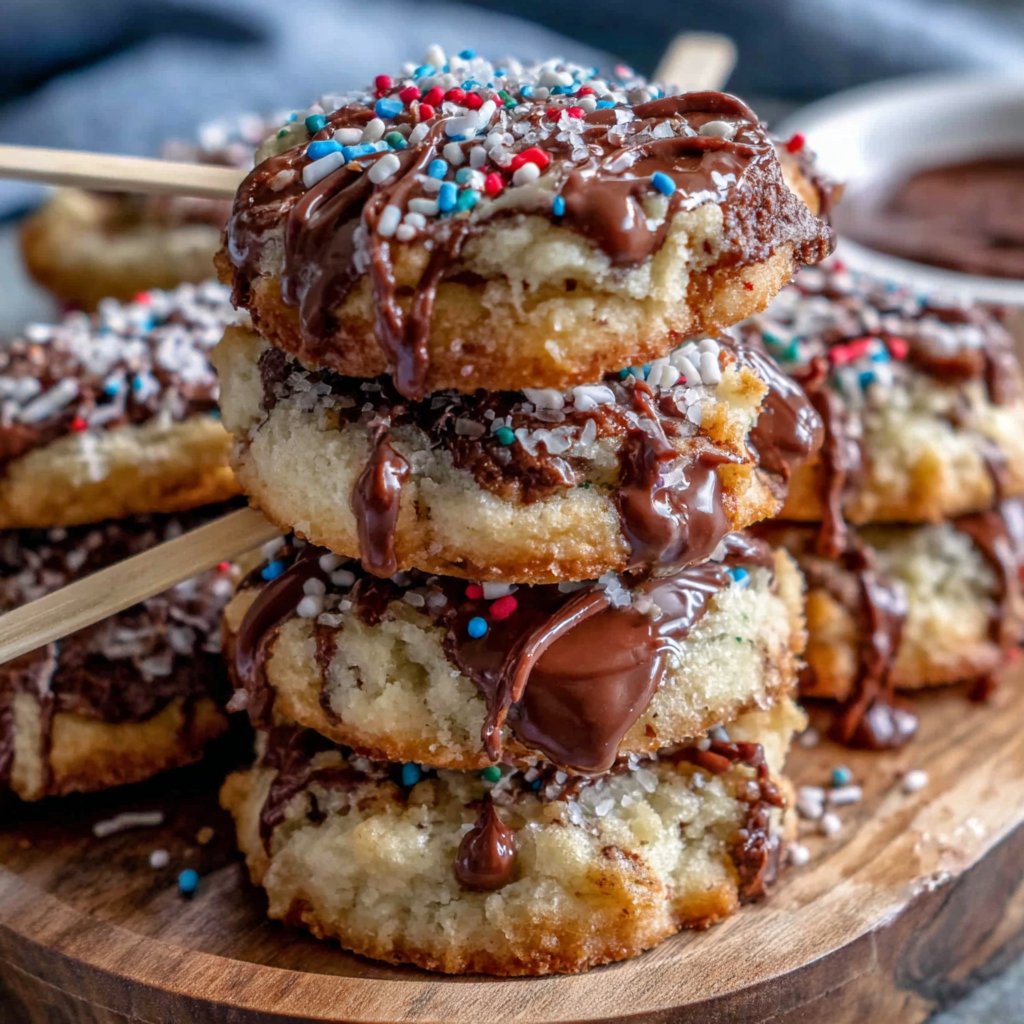
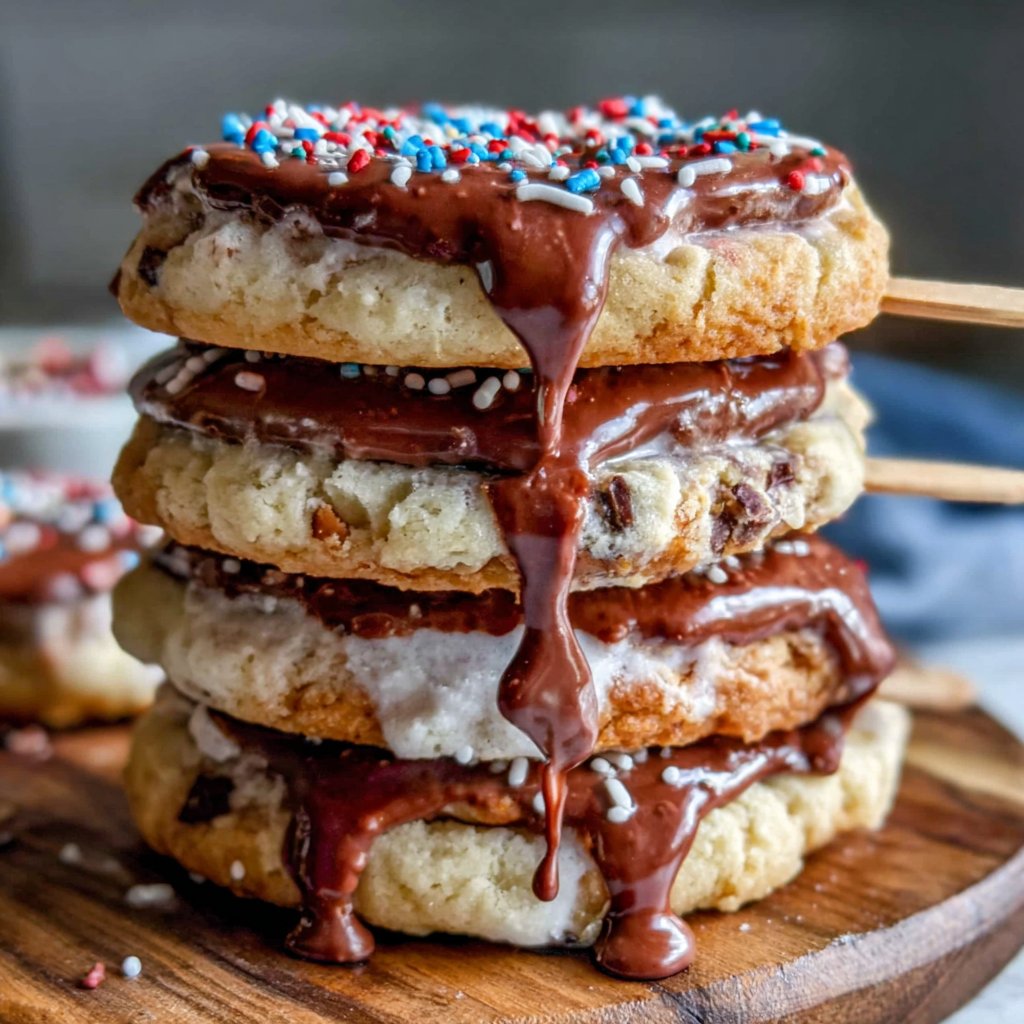
Melt white chocolate according to package instructions. Dip cookie pops into the chocolate, and immediately place them on parchment paper. Use black gel to add cap designs and sprinkle with edible glitter for a festive touch.
Let the pops cool completely before serving so the chocolate can set.
Pro Tips
- For a fun twist, try using colored chocolate chips instead of the white melts. They'll add a pop of color and flavor. Store leftovers in an airtight container for up to a week.
Decorating With Finesse
Melt the white chocolate smoothly for an even coating on your cookie pops. If you find the chocolate seizing up, try adding a teaspoon of vegetable oil to restore its fluidity. For easy dipping, place your melted chocolate in a tall, narrow container. This allows for quick dips without needing to coat all sides separately. After dipping, let excess chocolate drip off before placing the pops on parchment paper to set.
Using black decorating gel is a fantastic way to add personality to your graduation caps. If you're feeling adventurous, you can use colored melting chocolate instead to create varied designs. Experimenting with different tips on your piping bag can also give you more creativity with designs and textures on your cookies.
Storage and Serving Suggestions
Once decorated, the cookie pops can be stored at room temperature in an airtight container for up to five days. If you need to prepare in advance, consider baking the cookie bases and freezing them instead. Place baked cookies in a single layer in a freezer-safe container, separating layers with parchment paper to avoid sticking. Thaw them completely in the fridge before decorating to ensure the chocolate adheres well.
For serving, arrange your cookie pops in a colorful vase or pot filled with candy for a cheerful display at your graduation party. You could also individually wrap each cookie pop in clear cellophane and tie them with a ribbon for personalized party favors. These not only act as delightful treats but also as memorable keepsakes for guests.
Questions About Recipes
→ Can I make these cookie pops ahead of time?
Yes, you can make the cookie dough and chill it in advance, or bake the cookies a day before and decorate them the day of the event.
→ What’s the best way to store them?
Keep the pops in an airtight container at room temperature for up to one week. If they are decorated, try to separate layers with parchment paper.
→ Can I use gluten-free flour?
Absolutely! Just substitute regular flour with a gluten-free all-purpose flour blend for the cookie dough.
→ What other decorations can I use?
Feel free to use colorful sprinkles, edible markers, or fondant for decorating. The options are endless!
Whimsical Graduation Cookie Pops
Created by: The Chefzoeskitchen Team
Recipe Type: Quick Baking Recipes
Skill Level: Intermediate
Final Quantity: 12 pops
What You'll Need
For the Cookie Dough
- 2 3/4 cups all-purpose flour
- 1 teaspoon baking soda
- 1/2 teaspoon salt
- 1 cup unsalted butter, softened
- 1 1/2 cups sugar
- 1 egg
- 1 tablespoon vanilla extract
For the Decoration
- 1 cup white chocolate melts
- Food coloring (optional for decorating)
- Black decorating gel for caps
- Lollipop sticks
- Edible glitter (optional)
How-To Steps
In a bowl, combine flour, baking soda, and salt. In a separate large bowl, cream together softened butter and sugar until smooth. Beat in egg and vanilla. Gradually mix dry ingredients into the wet until combined. Chill dough for 30 minutes.
Preheat your oven to 375°F (190°C). Roll the chilled dough into small balls and flatten them slightly. Using a cookie cutter, shape them into caps and diplomas. Place on a baking sheet and insert lollipop sticks halfway into each cookie. Bake for 10-15 minutes until edges are lightly golden.
Melt white chocolate according to package instructions. Dip cookie pops into the chocolate, and immediately place them on parchment paper. Use black gel to add cap designs and sprinkle with edible glitter for a festive touch.
Extra Tips
- For a fun twist, try using colored chocolate chips instead of the white melts. They'll add a pop of color and flavor. Store leftovers in an airtight container for up to a week.
Nutritional Breakdown (Per Serving)
- Calories: 150 kcal
- Total Fat: 6g
- Saturated Fat: 3.5g
- Cholesterol: 20mg
- Sodium: 50mg
- Total Carbohydrates: 24g
- Dietary Fiber: 0g
- Sugars: 10g
- Protein: 2g