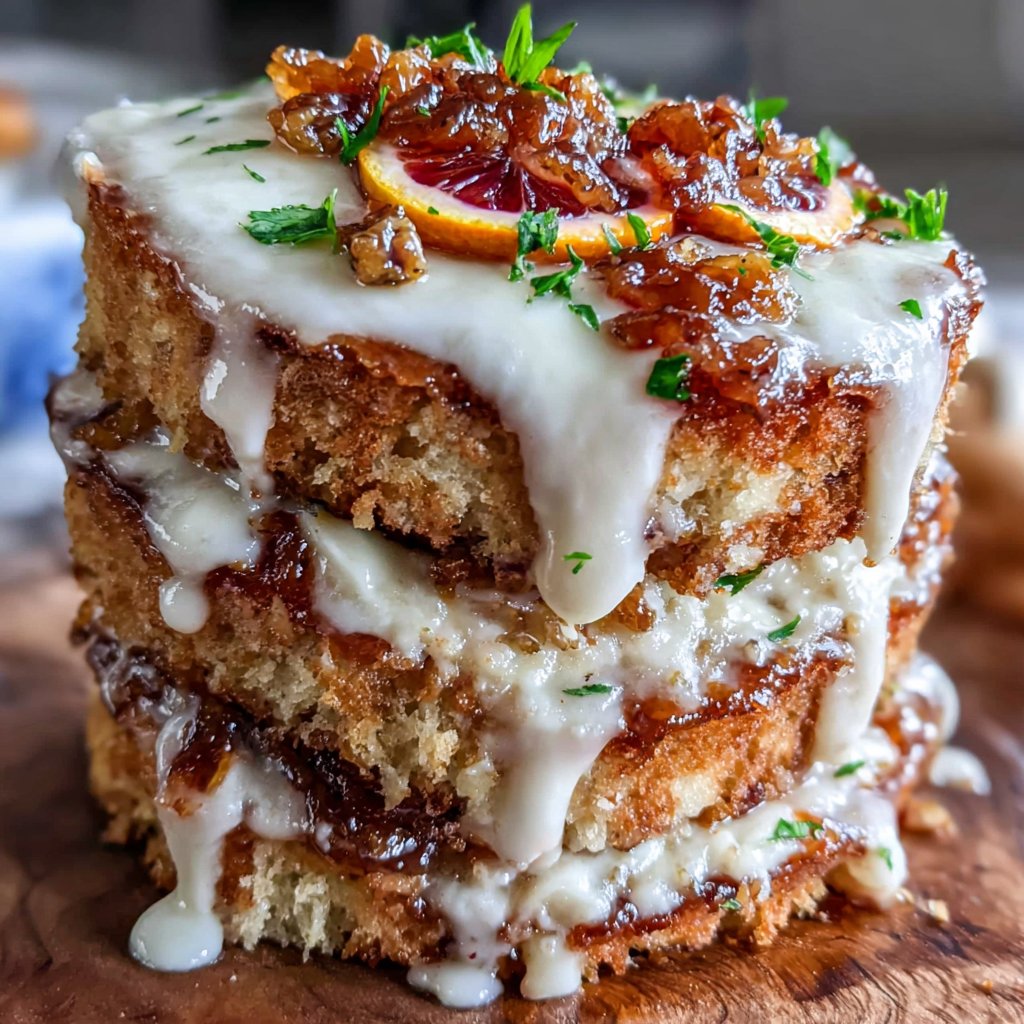
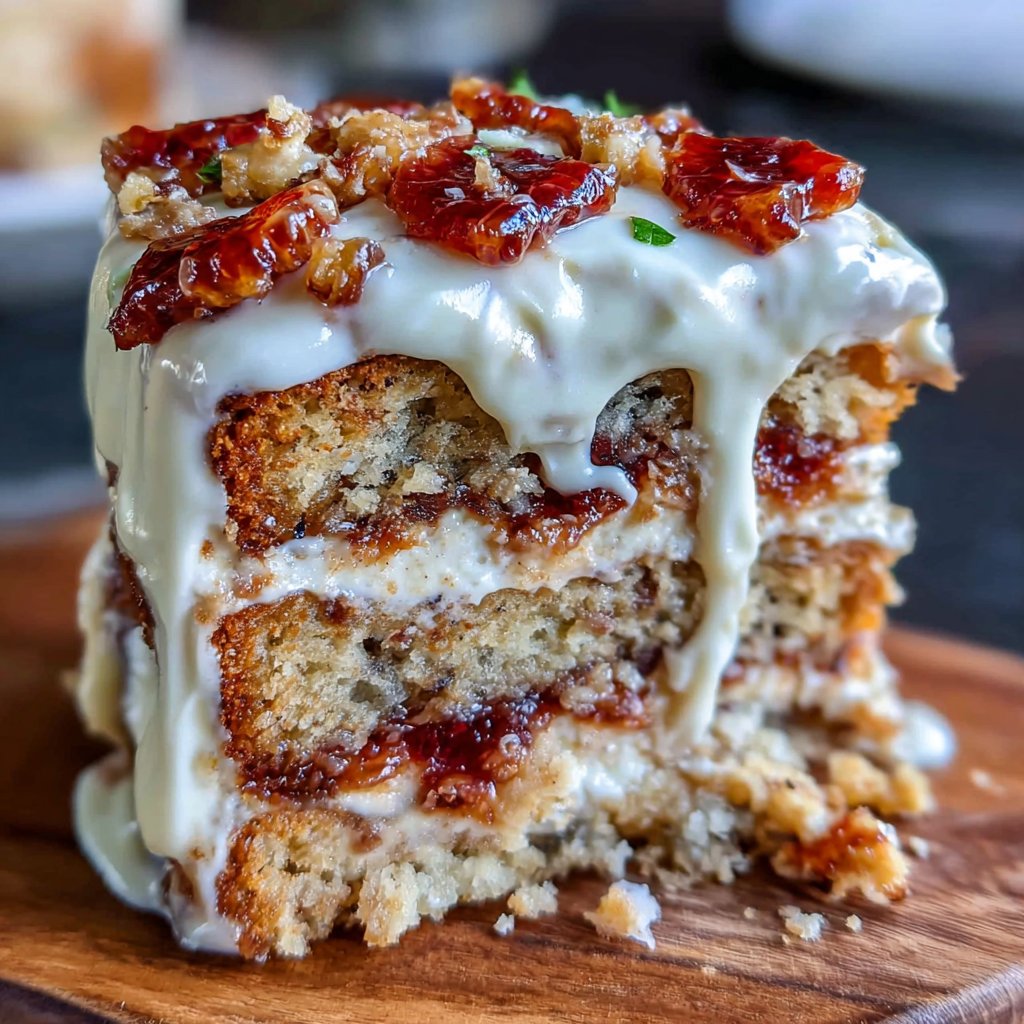
Blood Orange Spring Layer Cake
I absolutely adore this Blood Orange Spring Layer Cake! The vibrant citrus flavor is perfect for ushering in the warmer months. Each layer is infused with the zesty sweetness of blood oranges, which not only brightens the cake but also adds a beautiful color contrast. I love how the light, fluffy texture pairs beautifully with the rich cream cheese frosting. This cake is not just a treat for the taste buds; it’s also a stunning centerpiece for any spring gathering or celebration.
When I created this Blood Orange Spring Layer Cake, I wanted to embrace the cheerful vibes of springtime. I experimented with different layers and frostings to find the perfect combination. The fresh blood orange juice I incorporated really elevates the flavor, making it not just sweet but also refreshingly tangy. It took a couple of tries to get the frosting right, but adding a hint of zest truly transformed it!
This cake holds a special place in my heart because of the joyous reactions it receives at gatherings. I once brought it to a friend’s spring picnic, and it vanished in minutes! The vibrant color and delicious taste paired with a hint of floral essence provide a delightful surprise that I can't resist sharing.
Why You'll Love This Recipe
- Vibrant blood orange flavor that brightens your day
- Fluffy cake layers that are moist and flavorful
- Stunning to look at, making it perfect for celebrations
Understanding Blood Oranges
Blood oranges distinguish themselves from regular oranges through their unique flavor profile and striking color. Their deep reddish hue is a result of anthocyanin pigments, which also contribute tangy notes that enhance the sweetness in this cake. When choosing blood oranges, look for firm fruit with a rich color and a sweet aroma. Fresh juice and zest not only provide vibrant flavor but also ensure that the cake remains moist due to the natural acidity that balances the sweetness.
Moreover, the zest in this recipe is crucial for delivering an intense citrus aroma, which elevates the overall flavor experience. If you can’t find blood oranges, feel free to substitute with regular oranges or even grapefruits, but remember that the unique taste may differ slightly.
Perfecting the Cake Layers
When preparing the cake layers, ensure that your butter is at room temperature—this is vital for achieving a light and airy texture. If the butter is too cold, the mixture will not emulsify properly, which can lead to dense layers. Cream the butter and sugar until the mixture is pale and fluffy, usually about 3-5 minutes with a stand mixer. This step introduces air into the batter, creating that desirable lightness that makes a spring cake delightful.
For uniform baking, it’s essential to divide the batter evenly among the pans, using a kitchen scale for precision can make a significant difference. The layers tend to rise evenly and bake without doming if the batter is equally distributed. Keep an eye on them during the last few minutes of baking, as overbaking can dry out the cakes—look for a light golden color and a toothpick that comes out clean.
Ingredients
Gather your ingredients before starting!
For the Cake:
- 2 cups all-purpose flour
- 1 ½ teaspoons baking powder
- ½ teaspoon baking soda
- ¼ teaspoon salt
- 1 cup unsalted butter, softened
- 2 cups granulated sugar
- 4 large eggs
- ½ cup blood orange juice
- 2 tablespoons blood orange zest
- 1 teaspoon vanilla extract
For the Frosting:
- 8 oz cream cheese, softened
- ½ cup unsalted butter, softened
- 4 cups powdered sugar
- 2 tablespoons blood orange juice
- 1 tablespoon blood orange zest
Now you are ready to make your cake!
Instructions
Follow these steps for perfect results!
Prepare the Cake Batter
Preheat your oven to 350°F (175°C). In a bowl, whisk together the flour, baking powder, baking soda, and salt. In a separate large bowl, cream the butter and sugar together until light and fluffy. Add eggs one at a time, mixing well. Stir in blood orange juice, zest, and vanilla. Gradually add the dry ingredients to the wet mixture until just combined.
Bake the Layers
Divide the batter evenly among three greased 9-inch round cake pans. Bake in the preheated oven for about 25 minutes, or until a toothpick inserted into the center comes out clean. Allow the cakes to cool in the pans for 10 minutes before transferring to wire racks to cool completely.
Make the Frosting
In a mixing bowl, beat the softened cream cheese and butter until smooth. Gradually add the powdered sugar, mixing until combined. Add blood orange juice and zest; beat until fluffy.
Assemble the Cake
Once the cake layers are completely cool, place one layer on a serving plate. Spread a layer of frosting on top. Add the second layer and repeat the process. Place the final layer on top and frost the entire cake with the remaining frosting.
Decorate and Serve
For an extra touch, garnish the cake with additional zest or fresh blood orange slices. Slice and enjoy your beautiful Blood Orange Spring Layer Cake!
Enjoy your delicious creation!
Pro Tips
- Ensure your butter and cream cheese are at room temperature for the best texture in your frosting.
Storage and Make-Ahead Tips
This Blood Orange Spring Layer Cake can be made ahead of time, which is perfect for spring celebrations. After baking, allow the layers to cool completely and then wrap each layer tightly in plastic wrap. They can be stored at room temperature for up to two days or refrigerated for up to a week. For longer storage, freeze the layers for up to three months. Just ensure they are well-wrapped to prevent freezer burn.
When ready to serve, simply thaw the cake in the fridge overnight and frost while still slightly chilled. This will help the frosting adhere better and give you clean, sharp edges. It’s best to frost the cake closer to serving time, as frosting can lose its freshness and creaminess if left out for too long.
Troubleshooting Common Issues
If your cake layers are coming out dry, it may be due to overbaking or using too much flour. To avoid this, ensure you level your flour using a spoon-and-level technique rather than scooping directly. Also, keep an eye on your cakes in the oven, especially in the last few minutes, as each oven can vary. If you notice they are browning too quickly, covering them loosely with aluminum foil can help.
On the frosting side, if the cream cheese and butter mixture doesn’t come together smoothly, it might be due to temperature differences. Ensure both components are softened to the same texture; if one is too warm, it can result in a soupy consistency. If this happens, simply chill the frosting slightly until it firms up and re-whip.
Questions About Recipes
→ Can I use regular oranges instead of blood oranges?
Yes, but the flavor and color will be different; blood oranges are sweeter and more vibrant.
→ How do I store leftovers?
Store the cake in an airtight container in the refrigerator for up to 5 days.
→ Can I make this cake in advance?
Absolutely! You can bake the layers and freeze them, then frost when you're ready to serve.
→ Is this cake suitable for special dietary needs?
This recipe contains gluten and dairy, but you can substitute gluten-free flour and dairy-free alternatives if needed.
Blood Orange Spring Layer Cake
What You'll Need
For the Cake:
- 2 cups all-purpose flour
- 1 ½ teaspoons baking powder
- ½ teaspoon baking soda
- ¼ teaspoon salt
- 1 cup unsalted butter, softened
- 2 cups granulated sugar
- 4 large eggs
- ½ cup blood orange juice
- 2 tablespoons blood orange zest
- 1 teaspoon vanilla extract
For the Frosting:
- 8 oz cream cheese, softened
- ½ cup unsalted butter, softened
- 4 cups powdered sugar
- 2 tablespoons blood orange juice
- 1 tablespoon blood orange zest
How-To Steps
Preheat your oven to 350°F (175°C). In a bowl, whisk together the flour, baking powder, baking soda, and salt. In a separate large bowl, cream the butter and sugar together until light and fluffy. Add eggs one at a time, mixing well. Stir in blood orange juice, zest, and vanilla. Gradually add the dry ingredients to the wet mixture until just combined.
Divide the batter evenly among three greased 9-inch round cake pans. Bake in the preheated oven for about 25 minutes, or until a toothpick inserted into the center comes out clean. Allow the cakes to cool in the pans for 10 minutes before transferring to wire racks to cool completely.
In a mixing bowl, beat the softened cream cheese and butter until smooth. Gradually add the powdered sugar, mixing until combined. Add blood orange juice and zest; beat until fluffy.
Once the cake layers are completely cool, place one layer on a serving plate. Spread a layer of frosting on top. Add the second layer and repeat the process. Place the final layer on top and frost the entire cake with the remaining frosting.
For an extra touch, garnish the cake with additional zest or fresh blood orange slices. Slice and enjoy your beautiful Blood Orange Spring Layer Cake!
Extra Tips
- Ensure your butter and cream cheese are at room temperature for the best texture in your frosting.
Nutritional Breakdown (Per Serving)
- Calories: 360 kcal
- Total Fat: 22g
- Saturated Fat: 12g
- Cholesterol: 80mg
- Sodium: 160mg
- Total Carbohydrates: 42g
- Dietary Fiber: 1g
- Sugars: 25g
- Protein: 3g